What is the Recovery Console?
The Recovery Console is a special boot up method that can be used to help fix problems that are preventing your Windows installation from properly booting up into Windows. This method allows you to access the files, format drives, disable and enable services, and other tasks from a console prompt while the operating system is not loaded. It is suggested that the Recovery Console is to only be used only after Safe mode and the other standard startup options do not work. I feel that the Recovery Console is also useful in other situations such as removing malware files that start in both Safe mode and Standard Mode and thus not allowing you to delete the infection.
This tutorial will guide you through the installation of the Recovery Console and how to use it. For those who are familiar with DOS or the command prompt, you will find the Recovery Console to be very familiar. For those who are not comfortable with this type of environment, I suggest you read through this primer in order to get familiar with this type of interface:
Introduction to the Windows Command Prompt
How to install the Recovery Console to your hard drive
I recommend that you install the Recovery Console directly onto your computer so that if you need it in the future, it is readily available. The Recovery Console only takes up approximately 7 megabytes so there is no reason why you should not have it installed in case you need it.
To install the Recovery Console on your hard drive, follow these steps:
- Insert the Windows XP CD into your CD-ROM drive.
- Click the Start button.
- Click the Run menu option.
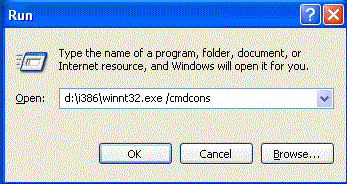
- In the Open: field type X:\i386\winnt32.exe /cmdcons , where X is the drive letter for your CD reader, and press the OK button. An image of this step can be found below:
- After pressing the OK button a setup window will appear similar to the one below.
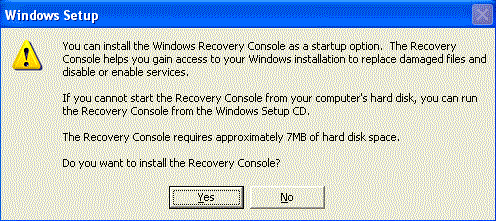
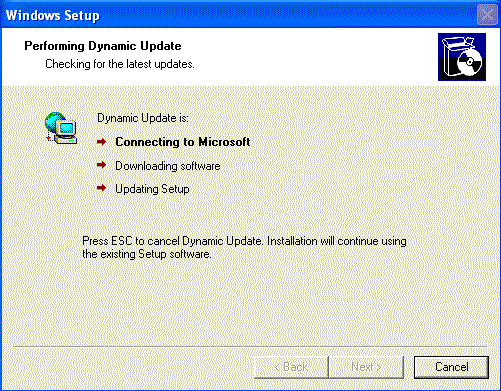
- Simply press the Yes button to continue with the installation of the Recovery Console. The setup program will then attempt to do a Dynamic Update to make sure you have the latest files as shown below.
- Simply allow it to continue and then when it is finished, you will be presented with a screen similar to the one below telling you so.
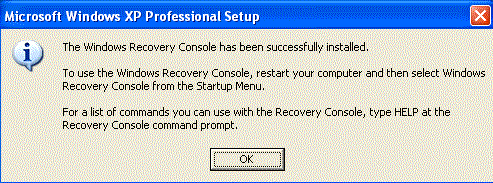
- Press the OK button and remove the CD from your computer.
Now when you start your computer you will have an option to start the Recovery Console.